2. Gameplay
2.1. The Track
No scenarios for Section 2.1
2.2. Skater Roles
For each Jam, a team must field one Jammer and at most four Blockers. One of these Blockers may be designated as the Pivot. Any Skaters who are not completely on the track at the Jam-Starting Whistle may not participate in the Jam, and do not count toward these limits.
—Origin: Section 2.2
Scenario moved and renumbered to Scenario C2.2.6.A
Scenario moved and renumbered to Scenario C2.2.6.B
Scenario moved and renumbered to Scenario C2.2.6.C
Scenario moved and renumbered to Scenario C2.2.6.D
Scenario moved and renumbered to Scenario C2.2.6.E
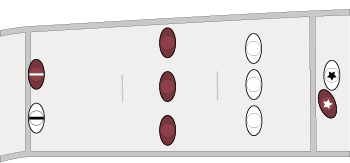
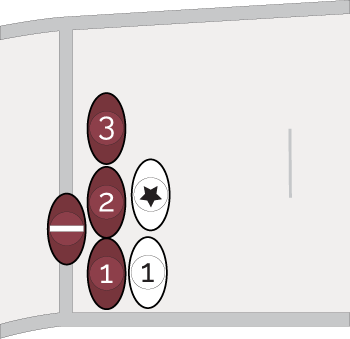
White Pivot is seated in the Penalty Box. Between Jams, three White Blockers—one of whom is wearing a Stripe—line up on the track.
Outcome: If the Jam starts with two White Skaters wearing the Stripe, the Officials should direct the White Blocker on the track to remove their Stripe.
Rationale: The Skater seated in the Box is considered to be the White Pivot for the Jam. As the White team fielded the correct number of Blockers, there is no need to send the “extra” White Pivot back to their bench.
Keep in Mind: If the White Blocker refuses to remove the Stripe, that White Blocker should be penalized. Refusal to obey an instruction about improper gameplay is insubordinate.
Keep in Mind: If the White Blocker engages in any privileges reserved for the Pivot before they have removed the Stripe, even if no warning has yet been issued, that White Blocker should be penalized, as their illegal Stripe had impact on the game.
Scenario moved and renumbered to Scenario C2.2.6.F
Scenario moved and renumbered to Scenario C2.2.6.G
2.2.1. Jammers
The Jammer is denoted as the Skater in visible possession of the Jammer helmet cover (a.k.a. “The Star”) at the beginning of the Jam.
—Origin: Section 2.2.1
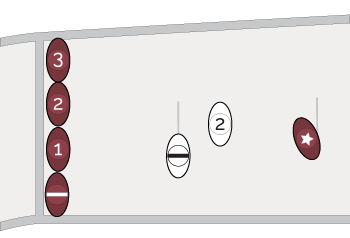
Red and White Skaters repeatedly shift positions between Jams. As the Jam starts, Red 34 is lined up fully behind the Jammer Line but is not wearing the Star, while Red 27 is lined up fully in front of the Jammer Line and is wearing the Star.
Outcome: Red 27 is the Jammer.
Rationale: Red 27 is the Skater in possession of the Star. The Star denotes who the Jammer is. Both Skaters should receive a penalty for beginning the Jam fully out of position.
Keep in Mind: Once the Jam starts, the Jammer Referee should communicate to Red 27 that they are the Jammer for this Jam. Since the rules do not accommodate for Jammers who forget their helmet covers, starting position should not take precedence over wearing the Star. In this case, both the Jammer (Red 27) and the Blocker (Red 34) have started the Jam in illegal starting positions.
Before the Jam-Starting Whistle, Red Jammer skates backward. They come to a quick stop and sprint forward at the Jam-Starting Whistle.
Outcome: If Red Jammer was moving clockwise or stopped when the whistle occurred, nothing should be done. If Red Jammer turned counterclockwise earlier and was gaining speed, this should be treated as a False Start.
Rationale: Jammers may not be gaining speed counterclockwise at the Jam-Starting Whistle.
2.2.2. Lead Jammer
A Jammer becomes ineligible to earn Lead during a Jam if they commit a penalty during that Jam or the Lineup Time before that Jam, exit the front of the Engagement Zone without having earned Lead, remove their helmet cover, or have their helmet cover removed by a teammate.
—Origin: Section 2.2.2
Red Jammer starts the Jam with their helmet cover inside-out. The stars are not visible with high contrast. They remove the cover, invert it, and put it back on their helmet. They then legally pass all Skaters, including the foremost Blocker.
Outcome: Red Jammer is declared Lead.
Rationale: Since Red Jammer did not have the ability to gain Lead prior to removing the Star from their head, they did not lose that ability.
Keep in Mind: If Red Jammer had removed the Star when the stars were visible, they would have lost the ability to gain Lead.
Red Jammer exits the Engagement Zone but does not earn Lead Jammer. White Jammer is knocked down, but not Out of Bounds. While White Jammer is down, the opposing Blockers—including the foremost Blocker—all skate clockwise behind them. White Jammer then stands back up.
Outcome: White Jammer should be declared Lead when they stand.
Rationale: By skating clockwise behind White Jammer, the Red Blockers gave up their superior position. As such, White Jammer earned those passes and they count toward earning Lead.
White Jammer makes their way through the Pack on their initial trip, while Red Jammer remains stuck at the rear. Through numerous blocks and changes in position, White Jammer earns a pass on all Blockers, but none of them are the foremost Blocker in the Pack when White Jammer earns the pass.
Outcome: The Jammer Referee should not declare White Jammer Lead (yet).
Rationale: White Jammer has earned a pass on all Blockers, but has never established superior position to the foremost Blocker in the Pack. Lead Jammer is earned when the Jammer has earned a pass on all In Play Blockers and established a superior position to the foremost In Play Blocker.
Red Jammer passes all Blockers on their initial trip through the Pack, except for one White Blocker. Red Jammer legally pushes White Blocker to the front of the Engagement Zone, and then Out of Play.
Outcome: Red Jammer is declared Lead as soon as White Blocker leaves the front of the Engagement Zone.
Rationale: Red Jammer only needs to pass the In Play Blockers to earn Lead Jammer.
White Jammer and Red Jammer are both ahead of all Blockers except White Pivot. Red Jammer is ahead of White Jammer, and pushes White Pivot legally out of the Engagement Zone.
Outcome: Red Jammer is declared Lead.
Rationale: At the moment that White Pivot left play, both Jammers had passed all In Play Blockers. Because Red Jammer was foremost, Red Jammer was declared Lead.
Red Jammer passes all Blockers on their initial trip through the Pack, except White Pivot. Due to unrelated gameplay, Officials declare a No Pack situation. Red Jammer remains behind White Pivot.
Outcome: The Jammer Referee should not declare Red Jammer Lead (yet).
Rationale: Although White Pivot is now out of play, No Pack situations are different from Out of Play situations regarding earning passes and gaining position to earn Lead Jammer status. During a No Pack situation, a Jammer must still earn passes and may not illegally gain position on Skaters while the Jammer is Out of Bounds.
Keep in Mind: As White Pivot is currently the foremost Blocker, Red Jammer could earn Lead Jammer status by passing White Pivot.
Keep in Mind: If the Pack was reformed and White Pivot was ahead of the Engagement Zone, at that point Red Jammer would meet the requirements to earn Lead Jammer status.
2.2.3. Pivot
No scenarios for Section 2.2.3
2.2.4. Passing the Star
A team’s Jammer may transfer their Role to their team’s Pivot by successfully completing a legal Star Pass. A legal Star Pass requires the jammer to hand the Star to their team’s Pivot while both Skaters are Upright, In Bounds, and In Play; and while neither Skater is en route to, or In Queue for, the Penalty Box.
—Origin: Section 2.2.4
White Jammer removes their helmet cover and directly hands it to a White Non-Pivot Blocker. White Jammer releases the helmet cover. White Non-Pivot Blocker immediately drops the helmet cover.
Outcome: No penalty
Rationale: While White Jammer may only pass the Star to their Pivot, because the White Blocker immediately dropped the Star, there has been no impact on gameplay.
Keep in Mind: If White Blocker did not immediately relinquish control of the helmet cover, a penalty would be issued to White Jammer.
Keep in Mind: If White Jammer were holding the Star and White Blocker wrested it from their grasp, it would have been White Blocker who initiated the illegal Star Pass, and thus White Blocker would be penalized.
White Jammer removes their helmet cover and hands it to White Pivot. Before White Jammer releases their grip on the Star, White Pivot is knocked Out of Bounds. White Jammer then releases the Star to the Out of Bounds Pivot.
Outcome: The Star Pass is unsuccessful. Both Skaters retain their existing Roles. No penalty is warranted at this time, but the Pivot is warned they are not the Jammer.
Rationale: Although White Jammer attempted to pass the Star while White Pivot was eligible, a Star Pass is a single point of exchange: the moment at which the Star is released. Since the Skaters’ Roles are not affected, and it is legal for the Pivot to control the helmet cover, there is no impact on gameplay.
Keep in Mind: If, after being warned that they are not the Jammer, the Pivot puts the Star on (or fails to remove it), they should be penalized.
White Pivot’s Stripe falls off in normal gameplay. White Jammer removes their helmet cover, hands it to White Pivot, and releases the Star.
Outcome: The Star Pass is unsuccessful. Both Skaters retain their existing Roles. No penalty is warranted at this time, but the Pivot is instructed to drop the Star.
Rationale: A Pivot who is not visibly wearing the Stripe cannot use the privileges of being a Pivot, such as receiving a Star Pass or even recovering the Star after an incomplete Star Pass. Because the Pivot’s helmet cover came off due to gameplay (as opposed to the Pivot intentionally removing it), they are warned that they are not the Pivot and allowed to relinquish control of the Star.
Keep in Mind: Once White Pivot is aware that they are not visibly wearing the Stripe, they must immediately relinquish control of the Star.
Red 21 is the Jammer. They remove their helmet cover and throw it at Red 45, who is the Pivot. Red 45 (still the Pivot) catches the helmet cover and hands it back to Red 21 (still the Jammer). Both Skaters grip the Star, then Red 21 releases it. Red 45 maintains control of the Star and puts it on their helmet.
Outcome: Red 45 is now the Jammer.
Rationale: Throwing the Star is an incomplete Star Pass, not an illegal one. A Star Pass cannot be successfully completed by throwing. Catching the Star (out of the air) is equivalent to retrieving it (from the floor); the Pivot is not required to let the Star fall to the track first. Once Red Jammer clutches the helmet cover, they reestablish their control of the Star regardless of whether the Pivot lets go or not. They then complete the Star Pass in a legal fashion.
While moving through the Pack, the Star comes off Red Jammer’s helmet and sticks to the Velcro on White Blocker’s wrist guard. White Blocker pulls the helmet cover free and drops it.
Outcome: White Blocker is not issued a penalty.
Rationale: White Blocker gained temporary possession of the helmet cover and dropped it. Because White Blocker did not intentionally attempt to remove the Star from Red Jammer’s helmet, they should not be issued a penalty for accidentally coming into control of the Star as long as they immediately relinquish control of the Star. The Star may get moved as part of normal gameplay, but may not be controlled by anyone other than the Jammer or Pivot.
Keep in Mind: If White Blocker had not touched the Star, which was stuck to their wrist guard and allowed Red Jammer or Pivot to recover it once they were aware of it, similarly no penalty would be warranted.
Keep in Mind: If White Blocker had pulled the Star off their Velcro, but not immediately relinquished control of the Star once they removed it from their wrist guard, a penalty would be warranted.
White Jammer legally passes the Star to White Pivot. Later in the Jam, White Pivot-turned-Jammer receives a penalty and goes to the Penalty Box. The Jam ends and Red team calls an Official Review. As a result of the review, the original White Jammer receives a penalty for an illegal action they took as Jammer.
Outcome: The additional penalty should be served by White Pivot-turned-Jammer and recorded for the original White Jammer. The original White Jammer should not be allowed to participate in the game until time for the penalty they earned has completed.
Rationale: White Jammer legally passed the Star, making White Pivot the new Jammer, but received a penalty upon review for an action committed while they were the Jammer. This would put two different White Skaters in the Box as a Jammer. A penalty is assigned to a Skater. The penalty time is assigned to a Role, with the Skater originally in that Role not allowed to participate until it has been served.
In this example, the original White Jammer receives the penalty and the current White Jammer (former Pivot) serves the time. Reverting the current Jammer to a Pivot or having the original Jammer serve the time as a Blocker would deprive Red team of earned advantages.
2.2.5. Blockers
No scenarios for Section 2.2.5
2.2.6. Skater Starting Locations
As the Jam-Starting Whistle sounds, Red Jammer’s left skate has rolled forward, past the Jammer Line.
Outcome: Red Jammer is issued a False Start warning and must yield their position to all Skaters in their immediate vicinity. If they do not Yield, they will receive a penalty.
Rationale: At the Jam-Starting Whistle, Red Jammer was touching both their correct starting location and an illegal starting location.
Keep in Mind: Until they have been issued this warning, they cannot be penalized for failure to Yield.
As the Jam-Starting Whistle sounds, White Pivot has lined up entirely in front of the Pivot Line.
Outcome: White Pivot immediately receives a penalty for illegal positioning.
Rationale: White Pivot was entirely out of position, having both skates ahead of the Pivot Line. They are immediately penalized, rather than warned and allowed to yield, because this is a flagrant violation of the rules regarding starting positions.
As the Jam-Starting Whistle sounds, White Blocker is Out of Bounds on the inside of the track.
Outcome: White Blocker is directed to return to their bench and cannot participate in the Jam.
Rationale: White Blocker was not on the track at the start of the Jam and cannot participate in that Jam.
Keep in Mind: Even if White Blocker were Straddling, they would still be considered Out of Bounds, thus not on the track, thus not allowed to participate in the Jam.
All White Blockers (including White Pivot) line up legally between Jams at the Pivot Line, but not touching the line. Red Pivot lines up behind them. Immediately before the Jam starts, Red Pivot reaches forward with their leg and places their skate on the Pivot Line.
Outcome: The White Non-Pivot Blockers should all be issued False Start warnings, and must Yield their positions to all nearby Skaters; any who do not Yield should receive a penalty.
Rationale: Red Pivot established their position in contact with the Pivot Line before the beginning of the Jam. Non-Pivot Blockers must begin the Jam behind the hips of any Pivots in contact with the Pivot Line. All Non-Pivot Blockers with hips ahead of the Red Pivot are therefore required to Yield.
In an attempt to reach the track before the Jam begins, Red Blocker jumps from out of bounds. The Jam-Starting Whistle blows while they are still airborne. Red Blocker lands in bounds and upright after the Jam begins.
Outcome: Red Blocker attempted to enter the track from an out of bounds state and was still airborne at the start of the Jam. They should be ordered back to their bench and may not participate in the Jam.
Rationale: While airborne, a Skater retains the attributes of their previous status. Red Blocker’s previous status was Out of Bounds. As such, they remain Out of Bounds while airborne. Red Blocker was not on the track when the Jam began.
As the Jam-Starting Whistle sounds, Red Pivot’s left skate has rolled backward, behind the Jammer Line. Red Pivot is issued a False Start warning. Red Pivot disengages from play, attempting to Yield to Skaters in the immediate proximity. No other Skaters take advantage of Red Pivot’s attempt to Yield.
Outcome: Red Pivot is no longer required to Yield and may continue to play.
Rationale: Red Pivot made a genuine attempt to Yield their position, allowing time for Skaters in proximity to take advantage. Giving Skaters in the immediate vicinity a reasonable opportunity to take advantage, even if that opportunity is not exercised, is enough to relieve Red Pivot of their requirement to Yield.
All four Red Blockers line up directly behind the Pivot Line, leaving no room for another Skater to be legally positioned in front of them. White Blocker positions themself in front of the Red Blockers by straddling the Pivot Line.
Outcome: White Blocker is penalized immediately upon the jam starting whistle.
Rationale: Even though the White Blocker is partially legally positioned, they have intentionally adopted an illegal starting position to gain an advantage. Even if a False Start warning was issued, the White Blocker has already gained a strategic advantage by being positioned ahead of the Red Wall and impeding the Red Blockers’ ability to immediately move forward. Because of this advantage and the intentional nature of the illegal position, an immediate penalty is warranted.
Keep in Mind: If White Blocker had been touching or had part of their skate ahead of the Pivot Line, but are otherwise not ahead of it, a False Start warning should be issued, and they should be given an opportunity to yield their position.
Keep in Mind: If the Red Blockers moved towards the Jammer Line so that the White Blocker’s immediate advantage is removed, then a False Start Warning should be given.
2.3. Pack & Engagement Zone
The Pack is the largest group of In Bounds and Upright Blockers in proximity and containing members from both teams.
The Engagement Zone is the area in which it is legal for Blockers to engage or be engaged.
—Origin: Section 2.3
Red Blocker 1 blocks White Blocker 1 Out of Bounds.
Outcome: No Pack. No penalty. White Blocker 1 must return in bounds to reform the Pack as soon as they legally can do so, and Red Blocker 1 must skate counterclockwise to allow White Blocker 1 to do so.
Rationale: Because there were no White Blockers within 10 ft (3.05 m) of any Red Blockers, no Pack could be defined. All Blockers must work together to allow a Pack to reform as quickly as possible.
The Red wall skates forward slowly while the White Blockers stand still.
Outcome: “No Pack” is declared. No penalty.
Rationale: The Red Blockers’ slow skating provided opportunity for White Pivot to maintain a Pack, so the Red Blockers should not be penalized. White Pivot is not required to maintain the Pack, but is required to work to reform a Pack if there is no Pack. Also, White Pivot is prohibited from making sudden movements that destroy the Pack.
Keep in Mind: If, instead of moving forward, the Red Blockers stayed still while White Pivot skated backward or took a knee, White Pivot should be penalized. Roller derby is played in the counterclockwise direction, so clockwise movement is held to a different standard than counterclockwise movement, and taking a knee is always a sudden action. Subtle movements such as shifting one’s weight while standing should not be considered sudden actions.
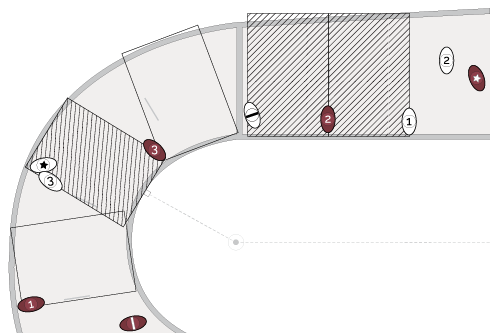
In the above image, Red 3 and White Pivot are more than 10 ft (3.05 m) apart, as are Red 1 and White 3. Accordingly, the Pack is composed of White Pivot, Red 2, White 1, and White 2. Red 1 and Red Pivot are out of play.
The Pack would be composed of the following Skaters if the following Blockers fell down:
White 2 |
White 1, Red 2, White Pivot |
White 1 |
No Pack. Red 3 and White 3 could be a Pack of two, but so could White Pivot and Red 2. |
Red 2 |
White 3 and Red 3 |
White Pivot |
White 1, White 2, Red 2 |
Red 3 or anybody ahead of them |
The Pack does not change. |
2.4. Blocks and Assists
No scenarios for Section 2.4.
2.5. Passing
Skaters gain superior position on other Skaters by passing them in the counterclockwise direction.
Jammers only “earn” a pass if the pass occurs while the Jammer is wearing the Star on their helmet with the stars showing.
—Origin: Section 2.5
White Jammer is on their second trip through the Pack and has not yet earned any passes on Red Blockers. Red Pivot receives a penalty, and begins to exit the track. White Jammer passes Red Pivot while Red Pivot is still in bounds.
Points: One point.
Rationale: Blockers who have been directed to the Penalty Box but are still touching In Bounds (including Straddling) can still be scored upon as if they had not been penalized. White Jammer earns a pass on penalized Red Pivot by gaining superior position before Red Pivot exits the track.
Keep in Mind: If there were other Red Blockers in the Penalty Box, earning a pass on Red Pivot would also result in earned passes on those penalized Red Blockers.